Welcome to Block #8: Clover Leaf Turn, from our Saturday Sampler 2014, Sew and Tell Series.
Our block patterns will be posted on the 2nd Saturday of each month, so check back through the year to make all twelve sampler blocks with us.
Need to catch up on Blocks 1-7? Start HERE.
Our blocks are 12 1/2" x 12 1/2" (12" x 12" finished)
All seam allowances are 1/4".
What to Cut:
A: Corn Yellow:
A: (2) 6 7/8” x 6 7/8 ”
B: Light Grey:
B: (2) 6 7/8” x 6 7/8 ”
C: Leprechaun:
C: (4) Template C
D: Water:
D: (4) Template D
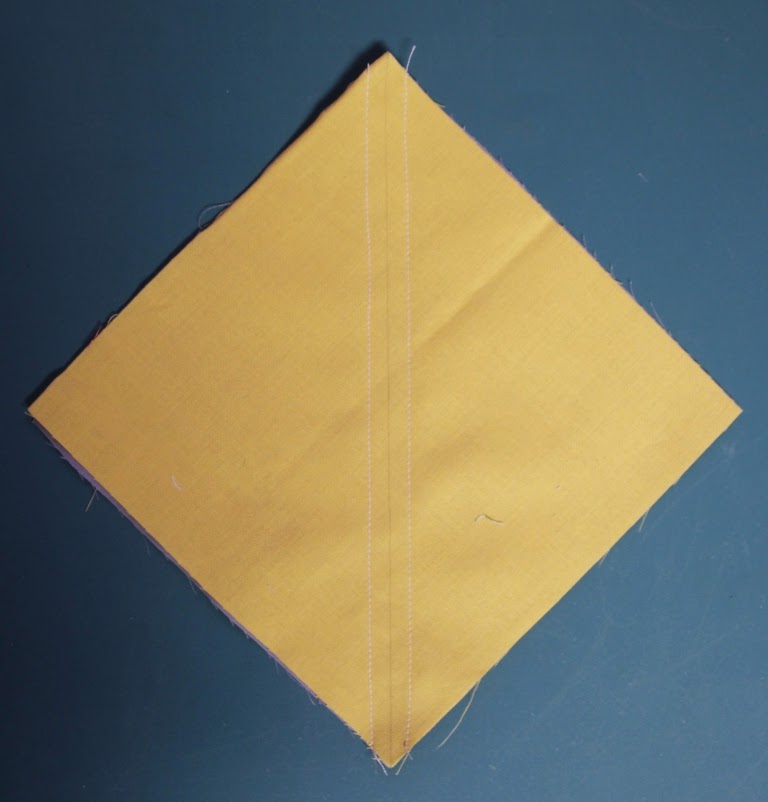
1. Pair one Corn Yellow and one Light Grey 6 7/8” squares right sides together.
2. Draw a diagonal line on the wrong side of the lightest colored fabric in each pair.
3. Sew 1/4” from both sides of drawn line. Cut apart on drawn line.
4. Press towards darkest fabric. Unit should measure 6 1/2” x 6 1/2”. Repeat to make four units.
5. Arrange the four units so that the Yellow A triangles meet in the center of the block. Sew units into rows, then sew the rows together. Block should measure 12 1/2” x 12 1/2” at this point.
Choose your favorite appliqué method.
To print the pattern at the correct size, right click your mouse on the image immediately below. Choose, Save Image As, then save the file to your computer. Print the image at actual size, be sure to turn off any Scale to Print features. Depending on your printer settings, you may have to adjust the size of the document so that the 1 inch guide measures a true 1 inch.
To print the pattern at the correct size, right click your mouse on the image immediately below. Choose, Save Image As, then save the file to your computer. Print the image at actual size, be sure to turn off any Scale to Print features. Depending on your printer settings, you may have to adjust the size of the document so that the 1 inch guide measures a true 1 inch.
The outer lines on the template include a 1/4” seam allowance if you prefer to do an appliqué method where the raw edges will be turned under. If using a fusible appliqué method, use the inner lines on the template and omit the 1/4” seam allowance.
For fusible appliqué method, follow instructions for the specific type of webbing you are using.
For turned-under method:
1. Sew a Leprechaun C and a Water D template shape together.
2. Trace appliqué template onto freezer paper, marking center line. Position freezer paper with the waxed side of the paper on the wrong side of the C-D unit. Align drawn center line with the seam between the two halves. Iron in place.
Press edges of appliqué shape around template. Use a light mist of Best Press or Magic Sizing to help edges stay in place.
3. Arrange the four petals onto the block foundation, matching the seam between the appliqué shape with the seam of the half-square triangle. Baste into place.
4. Stitch petals to background using a small, hidden stitch catching edge of appliqué shape to secure. Remove basting threads.


No comments:
Post a Comment