Welcome to Block #3: Sunny Side Up, from our Saturday Sampler 2014, Sew and Tell Series.
Our block patterns will be posted on the 2nd Saturday of each month, so check back through the year to make all twelve sampler blocks with us.
Our blocks are 12 1/2" x 12 1/2" (12" x 12" finished)
All seam allowances are 1/4".
What to Cut:
A: Papaya:
A: (1) 3 5/16” x 3 5/16 ”
B: Bleached White:
B: (2) 2 7/8” x 2 7/8”, cut in half diagonally
C: Corn Yellow:
C: (1) 5 3/16” x 5 3/16”, cut in quarters diagonally
D/E: Peapod:
D: (4) 2 7/8” x 2 7/8”, cut in half diagonally
E: (4) 3 1/2” x 3 1/2”, cut in half diagonally
F/G: Valentine:
F: (4) 3 1/2” x 3 1/2”
G: (1) 5 3/16” x 5 3/16”, cut in quarters diagonally
H/I: Peacock:
H: (4) 2 7/8” x 2 7/8”, cut in half diagonally
I: (8) 3” x 4”
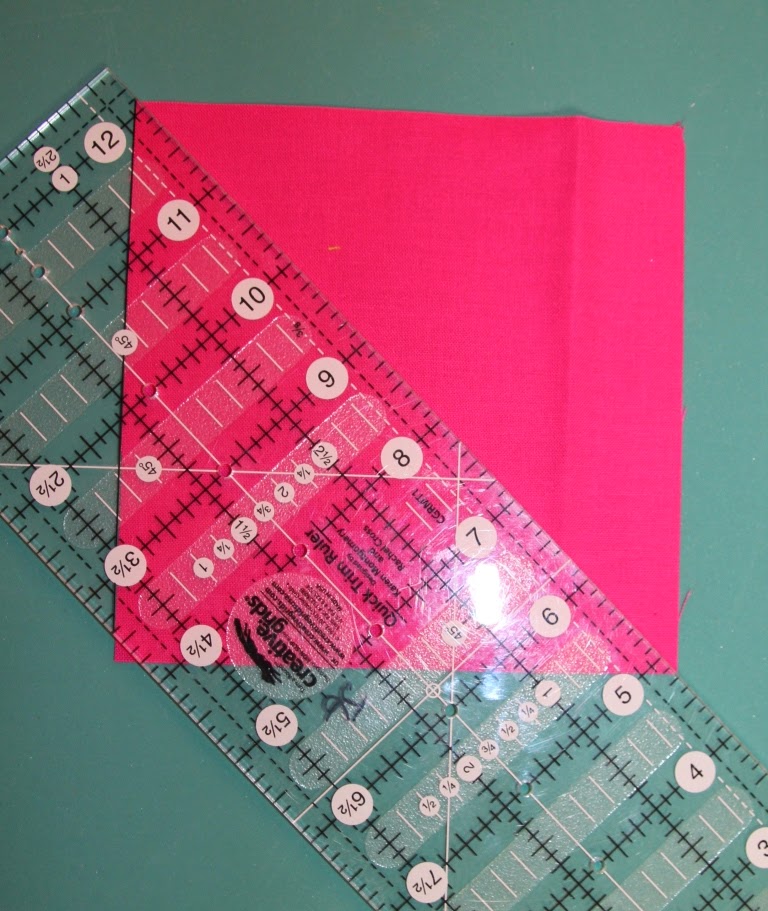
Here's another great use for the Quick Trim Ruler by Creative Grids. Align the 45 degree black line marking with the side of the B: 2 7/8" white square. Cut square in half diagonally.
Use the Creative Grids Ruler to cut the C: Corn Yellow and the G: Valentine 5 3/16" squares in half diagonally. Align the black 45 degree angle marking with the side of the square. Cut diagonally.
Cut square in half diagonally the opposite direction.
This will form 4 triangles.
Cut the D: Peapod and H: Peacock 2 7/8" squares in half diagonally.
Block Unit Assembly.
Assemble the Center Unit:
Arrange the white triangles around the A: Papaya 3 5/16" square.
Fold the Papaya square into quarters and finger press. This will create a temporary line to help align the triangles.
Pair a white triangle right sides together with the Papaya square, aligning the base of the triangle with the side of the square and the point of the triangle with one of the fold lines. Sew seam.
Press towards white triangle.
Repeat on opposite side of square.
Press towards white triangle.
Repeat on adjacent side.
Press towards white triangle.
Repeat on remaining side. Press towards triangle.
Square up block to measure 4 1/2" x 4 1/2"
Make 4 flying geese units using the C: Corn Yellow and D: Peapod triangles.
Make 4 flying geese units using the G: Valentine and H: Peacock triangles.
Arrange colors as shown.
Sew the background triangle to the main triangle as shown below.
Press towards background triangles.
Add background triangle to remaining side of the main triangle.
Press towards background triangles.
Square up units to measure 2 1/2" x 4 1/2".
Sew one unit of each color together.
Make 4 units.
Units should measure 4 1/2" x 4 1/2"
Paper Piece the corner units.
Make two copies of the paper piecing pattern so that you have a total of four block patterns. To print the pattern at the correct size, right click your mouse on the image immediately below. Choose, Save Image As, then save the file to your computer. Print the image at actual size, be sure to turn off any Scale to Print features. Depending on your printer settings, you may have to adjust the size of the document. The blocks on your copy will need to measure 4 1/2" x 4 1/2". Shrink or enlarge until they reach this size.
Cut apart the paper piecing pattern, leaving a very generous 1/4" of paper extending beyond the dotted lines.
Paper piecing requires you to think somewhat backwards about your block. You fabric will be positioned on back side of the pattern with the WRONG side of the fabric touching the back side of the pattern.
Begin with the F: Valentine 3 1/2" square. Hold your paper piecing pattern up to the light so that you can see through the pattern. Position the Valentine square of fabric on the back side of the paper so that it completely covers the area of the pattern indicated by #1. You can use either pins, a glue stick or small piece of double stick tape to hold the square in place.
Turn pattern over so that you can see the printed side. The fabric will now be right side down.
Use a notecard or small piece of cardstock to create a folding tool. Position the notecard exactly on the line between sections #1 and #2 on the pattern.
Fold the paper pattern along the notecard, exposing the Valentine fabric below.
Use the Add A Quarter ruler to trim the seam allowance 1/4" beyond the folded edge. The Add A Quarter Ruler has a lip that extends a 1/4" down the length of the ruler. This makes it easier to trim a perfect 1/4" seam allowance.
Unfold pattern to lay flat. Now flip the paper pattern so that the paper is printed side down and the fabric is showing right-sides up.
Align the I: Peacock 3" x 4" rectangle so that the edge of the rectangle is aligned with the edge of the Valentine fabric that you just trimmed in the step above. The idea is that you are aligning the Peacock fabric so that when you stitch the seam between Sections #1 and #2 and then unfold the Peacock, the Peacock will cover all of Section #2.
Once the Peacock fabric is aligned, pin or hold in place, then turn pattern over so that the printed side of the paper is up.
Tighten your normal stitch length to about 18-20 stitches per inch (Around 2.25 on a scale from 0-5)
Sew exactly on the line between Sections #1 and #2, starting and stopping only 1-2 stitches beyond the beginning and ending of the line.
Turn over so that fabric is right sides up. Finger press the seam towards the Peacock fabric. You can also use a press tool called the Little Wooden Iron. This will crease your fabric without using heat. If you use an iron, the heat can distort the paper.
Flip over so that printed side of pattern is right sides up.
Position the notecard on the line between Sections #1 and #3.
Fold pattern back along the notecard. Use the Add a Quarter Tool to trim the Valentine fabric leaving a 1/4" seam allowance.
Unfold pattern to lay flat again.
Flip paper pattern over so that fabric is right sides up.
Align edge of the second Peacock rectangle so that is aligned with the trimmed edge of the Valentine fabric. Pin or hold in place.
Flip over so that printed side of paper is up. Sew on line between Sections #1 and #3.
Flip over so that fabric is right sides up. Finger press the seam towards the Peacock fabric.
Flip so printed pattern is right sides up.
Align notecard on the line between Section #1-2-3 and Section #4.
Fold paper back along notecard. Use Add A Quarter Ruler to trim seam allowance to 1/4".
Flip so fabric is right side up.
Align Peapod triangle so that edge of triangle is aligned with trimmed edge of fabric. Pin or hold in place. Flip over so that printed side of pattern is up. Sew on the line between Sections #1-2-3 and Section #4.
Flip over so that fabric is right sides up. Finger press towards the Peapod triangle.
Flip over so that printed pattern is right sides up. Align notecard on line between Sections #1-2-3 and Section #5.
Fold pattern back and use Add A Quarter ruler to trim seam allowance to 1/4".
Unfold pattern to lay flat.
Flip over so that fabric is right sides up.
Align remaining triangle so that edge is aligned with trimmed edge of fabric. Flip over so that printed pattern is right sides up. Sew on line between Sections #1-2-3 and Section #5.
Flip so that fabric is right sides up. Finger press towards Peapod triangle.
Flip so that printed pattern is right sides up.
Trim pattern on the dotted line. Unit should be 4 1/2" x 4 1/2".
Gently tear paper out of seam allowances. Make four total units.
Arrange block units into three rows of three units each.
Sew units into rows.
Join rows together. Block should measure 12 1/2" x 12 1/2"