
Let's get started on our 1st block: A Very Good Place to Start!
Our blocks are 12 1/2" x 12 1/2" (12" x 12" finished)
All seam allowances are 1/4".
Here's the block in two colorways to show you how fabric choices make such a difference in how the block looks:


What to cut:
Cut four squares 3 7/8" x 3 7/8" each of four colors of fabrics:

Pair up the four colors into the following combinations:
(2) A Bleached White with (2) C Tulip Purple
(1) A Bleached White with (1) D Petal Pink
(1) A Bleached White with (1) B Valentine
(2) B Valentine with (2) D Petal Pink
(1) C Tulip Purple with (1) B Valentine
(1) C Tulip Purple with (1) D Petal Pink

Draw a diagonal line on the wrong side of the lightest colored fabric in each pair.
I love to use the Creative Grids quick trim ruler. It's so versatile and just the right size at 3 1/2" x 12 1/2". The ruler has a slight textured surface in some strategic places on the back that help it grip your fabric, so no slipping when you cut or draw lines! My other favorite feature is that one edge of the ruler is marked with whole numbers, while the other edge is marked in 1/2" increments. You'll see later in this post how handy that is when trimming up blocks of varying sizes.
To draw the diagonal lines, I make use of the 45 degree marking on the ruler. Line up the 45 degree line (it's a black line on the ruler) with the left edge of the fabric. Position the edge of the ruler on the points of the square. Presto, you know have a perfect diagonal/45 degree line.


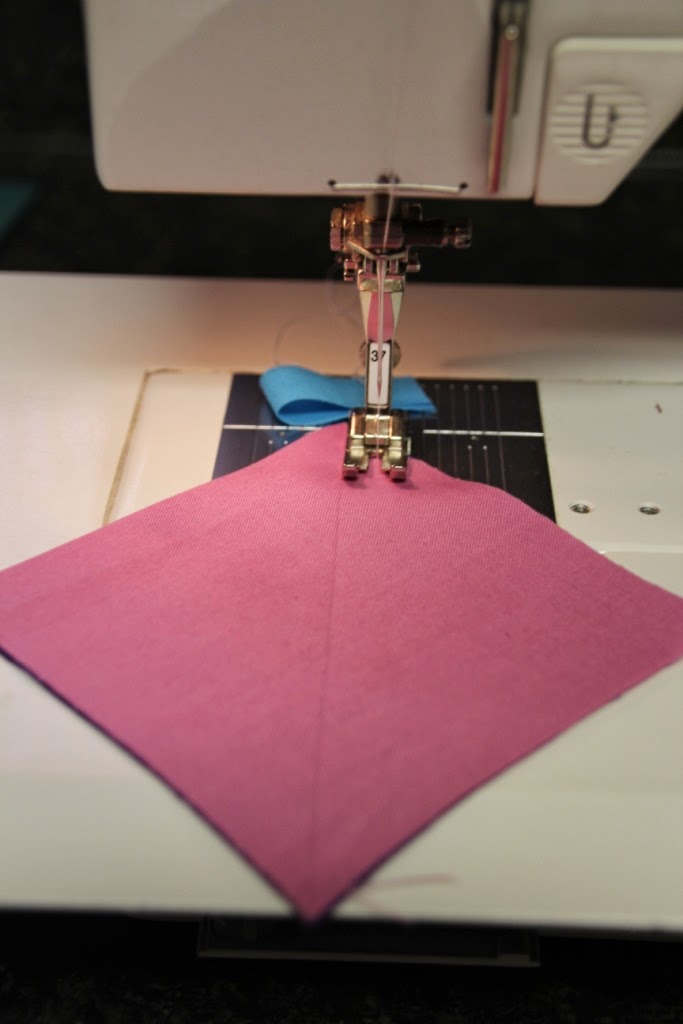
Sew 1/4” from both sides of drawn line. The blue fabric you see in the background of the photo is my "starter" piece. I prefer to always start sewing on a starter scrap whenever I can. This helps keep my thread tails under control and helps prevent your machine from coming unthreaded. Simply start sewing on the scrap, then let your machine do the work feeding your fabric along.
Sew a 1/4" to the right side of the drawn line.
Keep sewing, ending by stitching onto one of your little starter scraps.


Clip threads between your square and the starter scrap, leaving the starter scrap in place, then turn your square around and sew 1/4" to the other side of the drawn line.

This is what your square should look like at this step:

Cut apart on drawn line. The Creative Grids Quick Trim ruler makes quick work of this step as well. The ruler as a dotted line at the 1/4" mark. Simply line up the dotted line on the ruler with the drawn line on your square. Cut on the drawn line.


Press the seam allowance toward the darker fabric in each pair. You'll know have two half-square triangles from each set sewn.

The unit should measure 3 1/2" x 3 1/2" at this point. That just happens to be the width of the Quick Trim Ruler, so it's super-easy to square up your squares! Use the ruler to trim off the little excess at the corners of the block. These are often referred to as "rabbit ears". You'll want to trim them up so that they don't add extra bulk to your block.
Repeat steps with all color combinations. You'll end up with 16 half-square triangle blocks.


As with most quilting techniques, there are many ways to accomplish the same goal - and many tools and gadgets to make your work easier.
Another way to make half-square triangles is to use a tool such as The Angler 2 by Pam Bono. This tool eliminates the need to draw diagonal lines on your fabric. If you are making lots of half-square triangles, this comes in very handy.
You'll tape the Angler 2 tool to the deck of your sewing machine.
Rather than drawing lines, you'll align the tip of the square with the left set of lines on the Angler tool. Feed your square along, sewing to the end of the square as you continue to keep the point aligned with the line on the Angler.

Turn square around and repeat. Cut the square apart diagonally to yield to half square triangles.

Another similar tool is the Clearly Perfect Angle. This tool works essentially the same way as the Angler 2, but is made from a static cling type material that sticks to your sewing deck. The color coding on the Clearly Perfect Angle makes is easy to see where to align your squares.
Both tools work great for making flying geese units too!


Another one of my favorite time-saving tips is to chain piece my units. This means that instead of starting and stopping when I sew each square, I continue sewing leaving a thread chain in between each of my squares.

I'll sew down the right side first, then will turn the entire chain around and sew down the other side.

I leave the unit chained together and take it back to my cutting board.


I leave the triangles chained together and head to my ironing board. I cam then quickly press the units open, clip the threads and stack them for my next step.

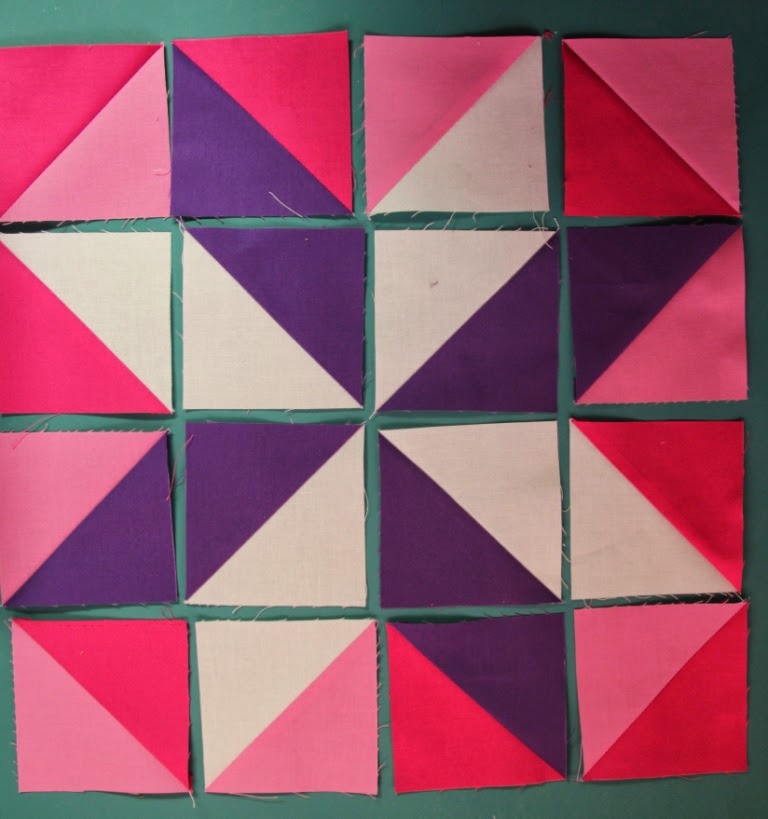
Once all the half-square triangles are made, it's time to arrange the units for the block.
Arrange the half-square triangles as pictured in four rows of four units each.
I once again use a chain piecing method to keep everything in order.
I flip the pieces in Row 2 right sides together with the pieces in Row 1. Sew the units together, keeping them chained together. In other words, don't clip your threads between the units.

Once Row 1 and 2 pieces are sewn together, I take the chain to my ironing board and press each seam in the opposite direction. This will help the seams nest together when we join the rows.

Continue with the same method, flipping the pieces in Row 3 right sides together with Row 2. Sew seam, chaining units together. Press seams in opposite directions.


Once the four rows are sewn together vertically, join the rows together horizontally.


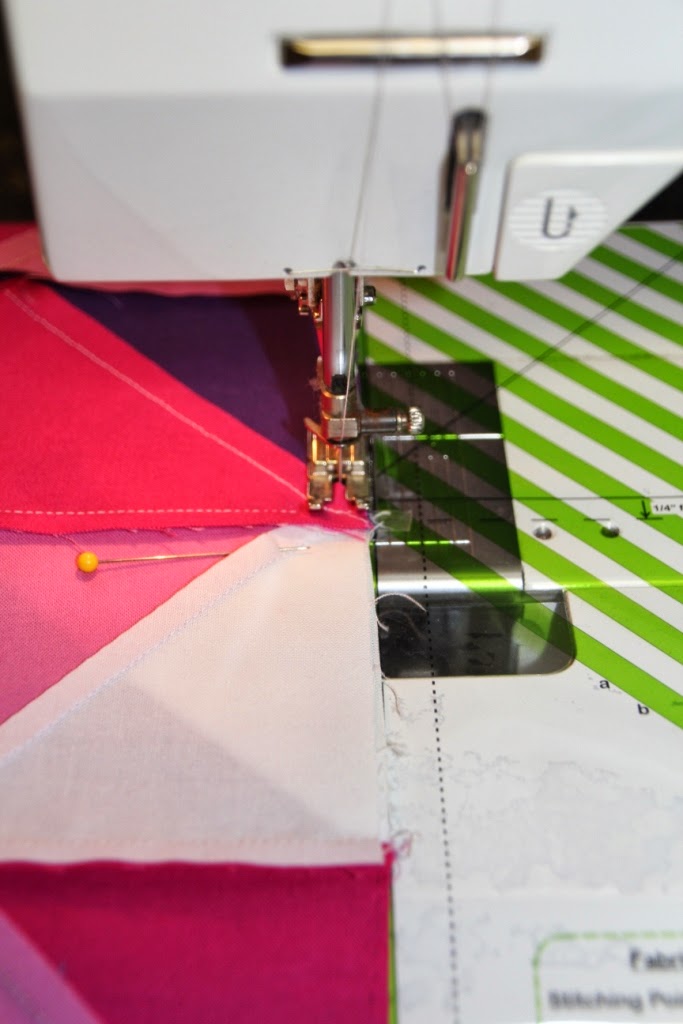
When you have several bulky seams to join together, you can sometimes use double stick tape to get a perfect seam match. I learned this trick from the talented Peg Spradlin. (You can learn all kinds of amazing quilting tricks from Peg. Visit her blog at handicraftsbypeg )
Match up the intersection of the seams. Position a pin on both sides of the seam. Insert a tiny piece of double stick tape where the seams meet. Be sure that the tape stays within the 1/4" seam allowance. If you insert the tape too far, you'll end up sewing over it and it will be difficult to remove. The tape is going to hold your pieces perfectly in place while you sew, but you want to be able to remove it after you have sewn the seam.


Sew the seam, then remove the tape. Make sure you remove before pressing so that you don't accidently melt the tape.
Continue to sew the rows together.

Block should now measure 12 1/2" x 12 1/2"


Congrats! You made it through the 1st block!
No comments:
Post a Comment