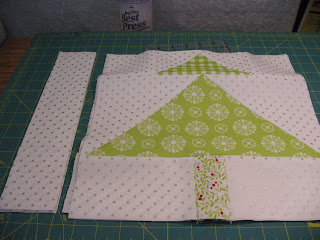

We are on row 8 trees, can you believe it. We are two thirds of the way to having a finished quilt top.
I chose 5 different greens from our Vintage Holiday collection.
Here is what you'll need to cut for each of the greens...
E - 1 each of each fabric
F - 1 each of each fabric
G - 1 each of each fabric
For the white background fabrics you'll need the following...
A - 10 each
B - 10 each draw a line diagonally
C - 10 each draw a line diagonally
D - 10 each
Step 1. Make the bottom section by taking D and G and sew together. Press towards green. Take other D and sew to D/G. Press to green. Set aside.
For the middle section...Take your C squares that have a line marked diagonally and place on F. Sew on the line, trim to 1/4" and press towards white.
Take the other C square and sew on the line, trim to 1/4" and press towards white. Set aside.
Make the top section, take the white square B and place on E. Sew on the line, trim to 1/4" and press towards white.
Once again take your B square and place on E. Sew on the line and trim to 1/4". Press towards white.
Next take your white A squares and add to your B/E flying geese. Sew on both sides. I pressed towards my white squares.
Lay out how you want your blocks. I went for a random look.
Sew top section to middle section. I pressed these open.
Decide layout of trees and start adding your filler/end strips to the left side.
Sew all blocks together and measure to 72-1/2". Trim if necessary.
Add the next sashing strip to the bottom of the row and add to your already completed top.
Not the best pic...sun was too bright.


No comments:
Post a Comment