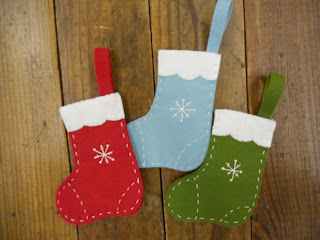
Trudy, from Nutmeg Hare contacted me a while ago to see if we might be interested in carrying her patterns. I knew at first glance that our customers would love them. The amount of detail that Trudy puts into her designs is nothing short of amazing.
But even more amazing then her designs is just how nice she is in person. I've so enjoyed getting to know Trudy a little bit through our e-mails back and forth. I knew that you just had to meet Trudy and her designs too. Trudy was gracious enough to share a little info in the following interview with us.
So without further ado . . .. . . I'd like you to meet Trudy
As many of us who enjoy handwork, stitching, and beautiful woolens, we can often recall our childhood memories and remember when this love began. I was a young girl in Washington, growing up with five brothers and sisters...Lucky me... because this gave me the opportunity to make handstitched gifts for many family members.
I can't remember a time when threads, fabrics, patterns, and any and all crafty things weren't a part of my daily life. I organized and made raggedies, santas, snowmen, and stitcheries for our annual gift show which was held at our home for 15 years and had become somewhat of a family tradition. I know I will never give up the love of "Needle and Thread".
Nutmeg Hare was on my mind during those years, but came into existence a bit over two years ago, when I took the plunge and had my website put together. I began with six stitchery patterns and knew that I wanted to keep adding to my collection. At the same time, wool applique was always something I planned to add into my pattern designs and now has become the main focus of my "Fun".
My family sometimes looks at me strangely as I get overly excited in bringing my wool appliques to life, and find myself staying up until the wee hours of the morning happily stitching. This is my most productive time as the quiet and peaceful hours tick on by.
I am a stay at home mom, married for 21 years, and the lucky mother of six kids ranging from ages 19 to age 4. They are all such different personalities... but I do believe my 10 year old daughter, Fallon, will soon be a big part of Nutmeg Hare as she takes great interest in watching and offering ideas to me as I work on my designs.
I feel very fortunate to be able to do what I love. I hope to be able to make patterns for many years to come...I am also excited to be hand dyeing wool as my new collection of "Nutmeg Hare" woolens will be ready soon. It is so much fun to see and experiment with the different colors as I dye wool pieces 1/2 yard at a time. I thoroughly enjoy choosing a name for each new wool color that I finish. I said to my family that it was like naming children...That was always one of the most fun parts of having a new baby....choosing the name. Perhaps that is why I wanted six:)
I would like to thank Julie for inviting me to share a bit of myself and my " Nutmeg Hare " beginning. If any of you are at all wondering where the name comes from...Well, as a child I always loved bunnies, hence the name "Hare" and because baking was also a big part of my childhood (I always wanted to be the youngest Pillsbury bakeoff winner), I thought "Nutmeg" fit well with it. I suppose that doesn't make a lot of sense, but perhaps the name will stand out in your mind as you shop at Prairie Point Junction and decide which "Nutmeg Hare" stitching project will be your next.


